Manually Scanning Prescriptions in Rx Detail
Maintaining proper documentation will ensure compliance with all relevant federal and provincial legislation, as well as third party payer policies and procedures. Scanning can only be done from the workstation the scanner is plugged into, but all scanned or attached documents can be viewed on any workstation. Documents must be scanned in a timely manner, such as while filling a prescription. Prescription hard copies must also be scanned after filling a prescription.
In PharmaClik Rx. prescription scanning attaches a scanned copy of an original written prescription to one or more prescriptions. Items you may want to scan in the Prescription folder include prior approval letters, transfers, fax authorization requests, TMRs, MARs, TARs, and written or verbal prescriptions
To manually scan a prescription in Rx Detail:
- Open the prescription in Rx Detail.
- Select Rx > Attachments. Select one of the following
- Single Scan—scans one side of the document.
- Duplex Scan—scans both sides of the document.
- Place the document into the document scanner.
-
Select the Accept button.
- For Single Scan, accepting will save one image.
- For Duplex Scan, accepting will save two images.
Reviewing Scanned Images
Once a prescription is scanned, it can be viewed from multiple places within PharmaClik Rx including the Workbench, Rx Detail, the patient's Profile tab and the Audit History window.
For example, to view the scanned prescription image from the patient's Profile tab, select the paperclip icon to review scanned images from the View Rx Attachments window.
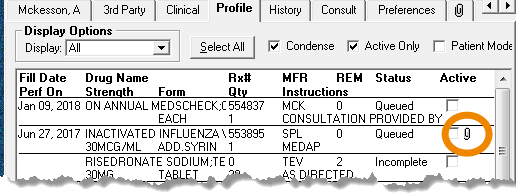
Note: You can print a copy of the scanned document from the View Rx Attachments window by selecting the Printer icon.